
[Drupal] Setting up a local environment for Drupal 9 Part 3~Start Drupal!
Continuation from the previous session.
Let’s download the installation file for Drupal 9 (in tar.gz format) from this site.
What is tar.gz?
Tar’ indicates that files are being archived together, and ‘gz’ indicates compression using gzip functionality.So, ‘tar.gz’ is a file format that combines and compresses files together. A well-known example of this is the ‘zip’ format. Zip combines the functions of bundling files and compressing them all at once, giving you a sense of doing both together. On the other hand, ‘tar.gz’ first bundles the files into a ‘tar’ file and then compresses it using ‘gzip’.
Let’s store the downloaded file in the following location using WinSCP.
/var/www/html
What is WinSCP?
It’s software that enables you to exchange files with a server using the FTP protocol.
I also frequently use this software for work. Using Teraterm alone can be cumbersome for file transfers.
We place it in /var/www/html because Apache defaults to having /var/www/html as the directory it exposes to the outside world. This is called the document root, and it’s usually best not to change it unless you have a specific reason to do so. Changing it can have wide-ranging effects.
Once the files are stored, you can extract the Drupal 9 installation assets using the following command.
↓Please enter the actual version for x.
If the directory named ‘drupal-9.x.x’ can be successfully expanded in /var/www/html/, that’s a success.
Next, we will change the name of the expanded directory.
↓YYY represents any character. It’s preferable to use characters that represent the site name.
Now, let’s access the following URL in your browser to install Drupal 9:
‘http://CentOS-IP-Address/Changed-Directory-Name‘ (Example: ‘http://192.168.56.100/okiyan‘)
If you see a screen like the one below, that means you’ve been successful. Select a language and click ‘Save and continue’.

It seems like someone is upset.

The error message says, ‘The translations directory does not exist’ and ‘The translation server is offline.’ Since ‘translation’ refers to translation, it means that it’s having trouble due to the absence of a directory for translation. In other words, it’s telling you to create the ‘sites/default/files/translations’ directory. Let’s create it with the following command.
Let’s try again! But it still shows the same screen…
Upon further investigation, it seems that SELinux is enabled. To disable SELinux, use the following command:
And then, restart the operating system.
It worked! Select ‘Standard’ and click ‘Save and continue’.

It seems like we’re being scolded again. Let’s resolve each of them as follows:

setting file
Let’s create a configuration file with the following command:AllowOverride All
</Directory>
Other
“PHP OPCODE caching” and “UNICODE library” indicate that PHP packages are missing.Install missing features
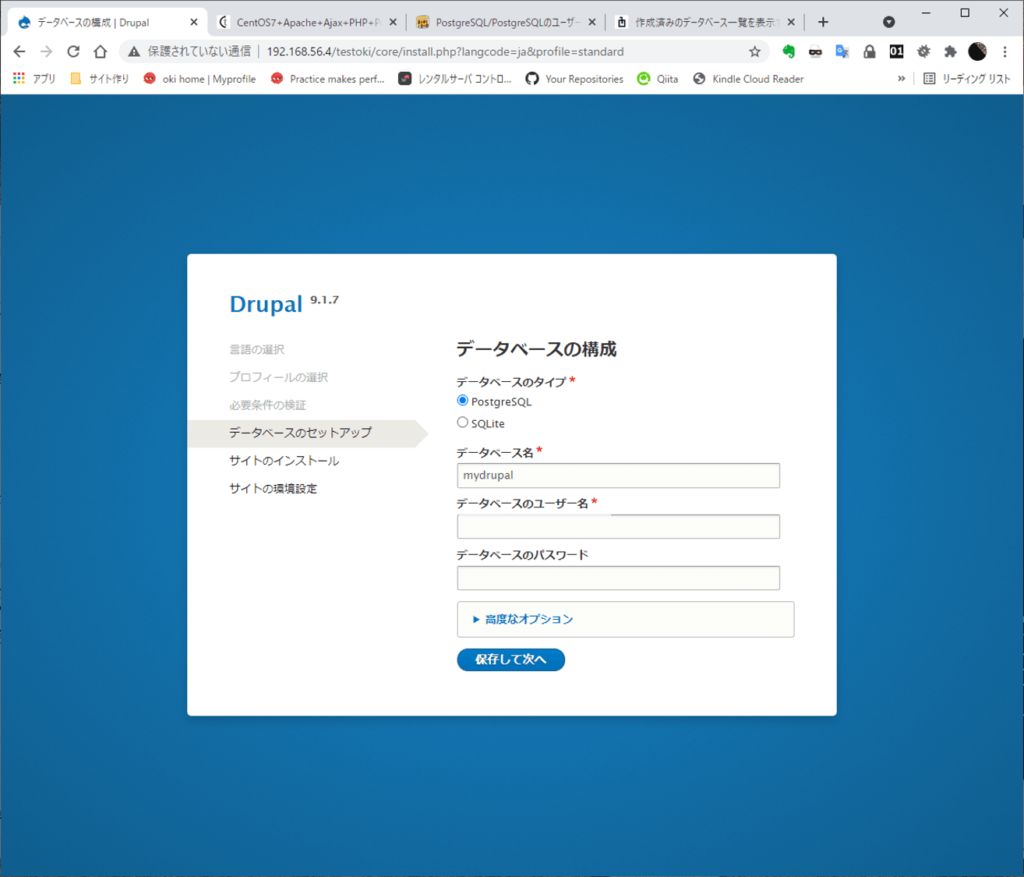
When you refresh the page, you will see the screen to input database information. Enter the database information and click ‘Save and continue’.
I got angry again. . orz

User Ident authentication failed.’ seems to be related to PostgreSQL configuration.
The solution for this is to change Ident authentication to password authentication using MD5. You can make the following changes around line 81 in /var/lib/pgsql/data/pg_hba.conf:
#host all all 127.0.0.1/32 ident
host all all 127.0.0.1/32 md5
# IPv6 local connections:
host all all ::1/128 md5
#host all all ::1/128 ident
Installation has started successfully!

Enter the site information as you like. I think you can turn off “Update Notifications” if you are not connected to the internet.

If you see a screen like the one below, Drupal installation is complete! Well done!

Just to be sure, let’s run the following command as it’s suggesting a change in settings.
That concludes the installation of Drupal on your local environment.
I am studying Drupal using the following book.It contains specific implementation methods for Drupal that are not found in Japanese books on Drupal 9.
